Author: thestudiojosie


iPhone Photography Tips

Happy Wednesday, everyone! A couple people have asked me how I take such sharp and bright photos on my phone, so today I decided to share my best tips with you! You can also find my favorite photo editing apps on this post I did a while ago. Enjoy!
TIP #1: Use all the light you can get!
I am a sucker for natural light, so I cannot stress this enough. Most often, a photo that isn’t the most eye-catching is just in need of some light! Sure, there are apps you can use to brighten the photo, but they won’t be as helpful as getting some real light.

BEFORE with the curtain over the window and the light off. Dark and not very attractive.

AFTER. Now that’s Insta-worthy! (With a few tweaks 🙂 )
TIP#2: Use the iPhone’s built-in features!
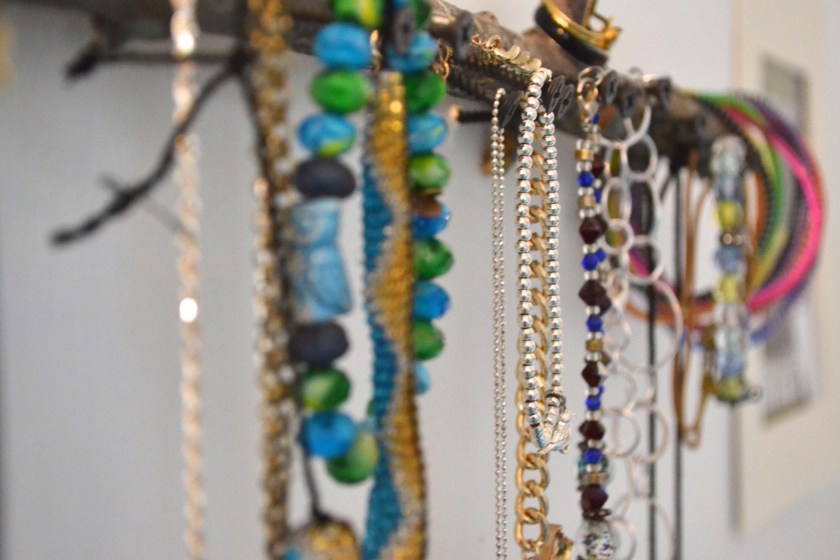
The iPhone has so many cool features you may not even know about, or do, and don’t know how to work them. I’m gonna show you! Let’s use this branch DIY (which I may do a tutorial on, even though it’s pretty self-explanatory.) as our example. Perhaps you don’t have any light or it’s dark out but you really want to post this photo. This ‘trick’ may help you there!

OK, this is just a sad, sad picture. You can’t even tell what it is! Here’s how to fix it:
First, press down in the middle of the camera. It should say “AE/AF LOCK” on the top in yellow letters, and there should be a yellow square around where you pushed, like this:

“What now?” You may ask. Well, that’s all up to you and the photo! If you’ve never used this feature before, you may want to play around with it for a little while. You can move the little yellow square anywhere on the photo, and it will adjust the brightness. You can make it brighter or darker, depending on your situation. There is also a little line that has a tiny sun on it. You can scroll up and down (up for brighter, down for darker). It looks a little something like this:


Now look at that! Hash brown no filter! (Haha, any Kimmy Schmidt fans out there?) Personally, I would edit this photo before I post it, but it’s up to you.
TIP #3: Get the right apps!
If I could have a whole iPhone full of just editing apps, I would. Seriously. I probably have about 4 now, but I used to have around 7. I know, scary. But then (everyone’s worst nightmare) I ran out of space on my phone. My #1 favorite editing app at the moment is A Color Story by the blog A Beautiful Mess, one of by faves! I did a review of it here.
But anyways, here’s how I edited it.

Here I am using the curves filter. At first, I was a little skeptical about it and wasn’t so sure how/when to use it, but they just came out with a video tutorial on it and it was so helpful. Now I use it in almost every photo of mine!
Now my favorite part… FILTERS! A Color Story has the best filters, in my opinion. They make colors pop and the whites super bright! I love it so much. I chose my current favorite filter, Pop Song, which is in the Good Vibes pack. That pack is free with the app, so if you don’t want to pay for others, at least you get this one and the Essentials! (I may or may not have bought them all. #NoShame)


I didn’t use the full filter, but you can adjust them which is SUPER helpful. Look at the final product! We went from that ugly and dark photo to this colorful and bright one! :0 Crazy, huh? So this just proves that you can do anything when it comes to to iPhoneography. You don’t have to be a professional photographer, I certainly am not, and look at what I just did! You just need to find good resources and you’ll be Insta-famous in no time. 😉


TIP #4: DO NOT USE ZOOM! Unless you like getting an unfocused and blurry shots, do not use zoom! If you need to zoom into something, go closer, if possible, or CROP afterwards.
TIP #5: Have a positive attitude and do not give up. Photography is a tricky skill to master — especially if you’re just using an iPhone. Do you want to know how many photos I take to get the perfect shot? Here’s just a little hint:

Yeah, I know. A LOT! Play around with different angles and try different props! But most of all…
HAVE FUN WITH IT!
Best of luck to you and your iPhoneography adventures!
Josie
Fourteen.
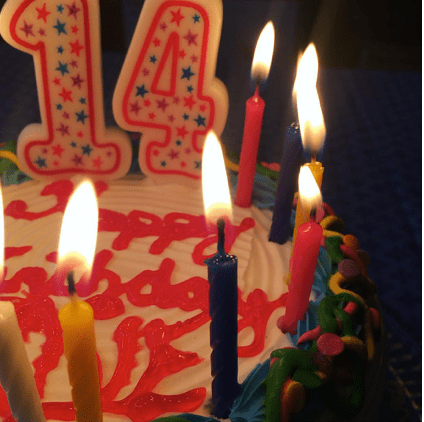
April 7, 2016
Today I turned fourteen.
I started Studio Josie when I was thirteen.
I can’t believe it’s been almost ONE YEAR!
I had an awesome day and I thank everyone for the wonderful birthday wishes.
I hope to celebrate many more of my birthdays here on my blog.
I hope you all had a fantastic day.
I sure did!
Josie
DIY Branch Jewelry Holder
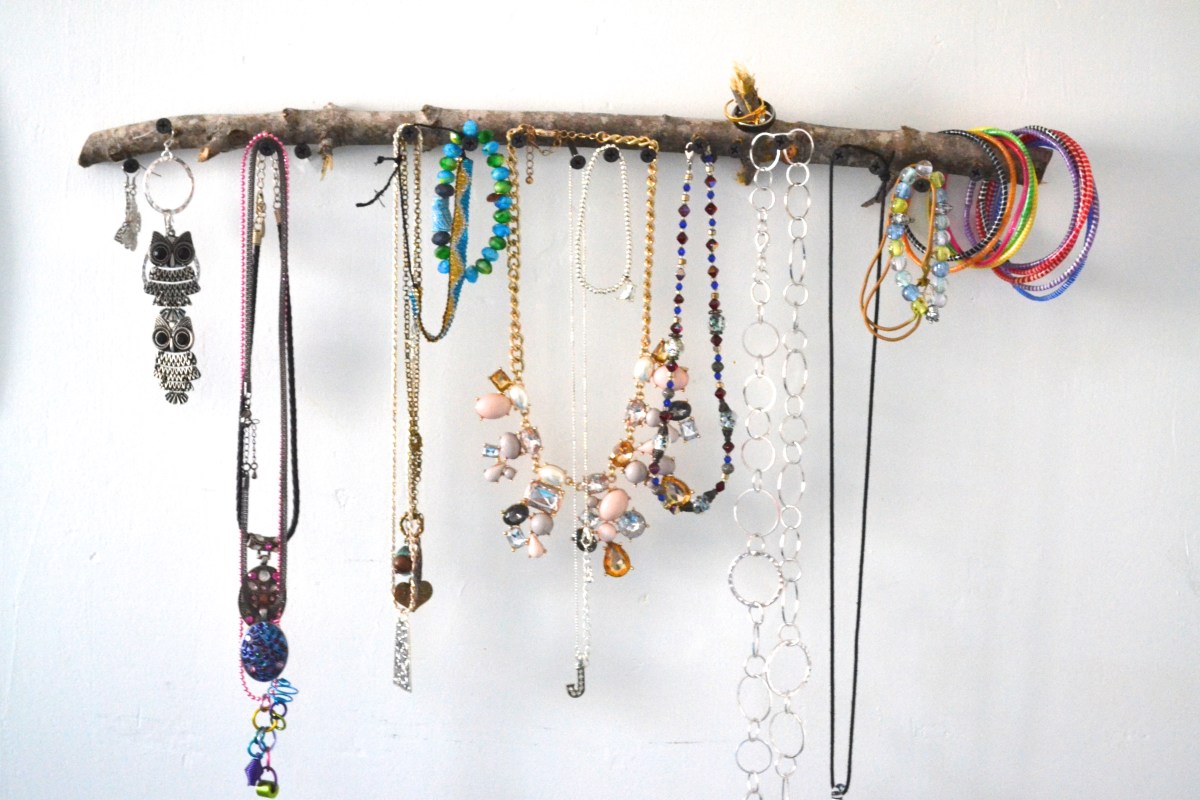
Last night, I was reorganizing my room a bit. I came across a box of jewelry and some necklaces were tangled together, and I decided to organize them. I looked up jewelry holder DIY’s on Pinterest and they were all pretty complicated and/or had materials I don’t have. I have been into doing weaving with sticks lately, and I had some unused ones in my room. (Weird, I know!)
Here are the materials you’ll need:
-Drywall screws (or whatever kind of screws you have, it really doesn’t matter)
-screwdriver
-branch (preferably a sturdy one that will be able to hold your jewelry.)
-jewelry
Here’s how I made it:
Step 1:
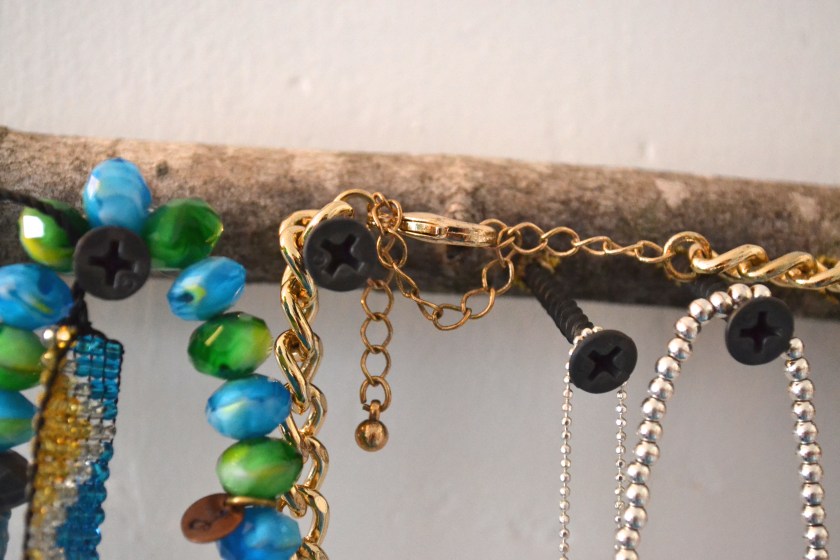
Take the branch and place the screw where you want it.
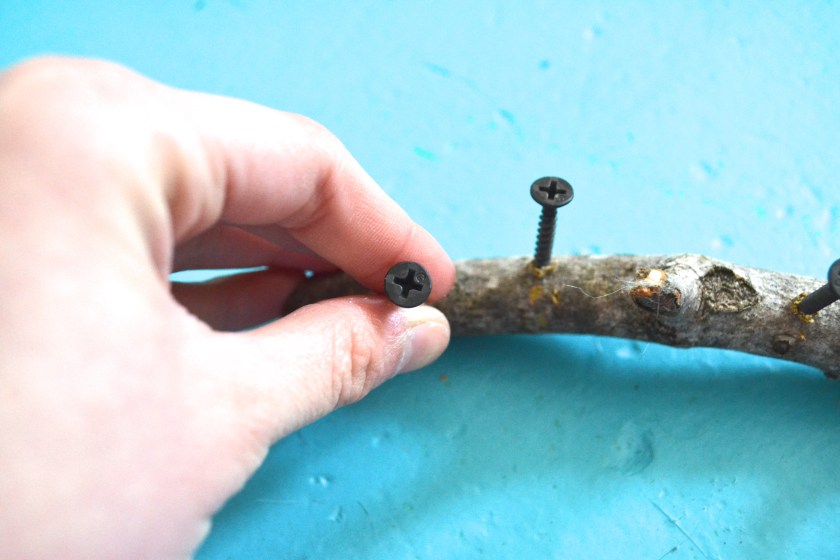
Step 2:
Take the screwdriver and twist the screw into the branch. You will need to push it in with a lot of force. You’ll know when it’s secure. I don’t like mine super close together and perfect. I mean… it IS a stick, after all, and sticks aren’t perfect! 🙂 I placed them all down the branch until it was pretty full, but you can do as many as you want.

Step 3:
Figure out where you want it on your wall. Depending what kind of wall you have, you may have to use a different kind of screw, but since mine are drywall, I used the same kind that I used in the branch. So if your walls aren’t drywall, check before you put in the screws!!
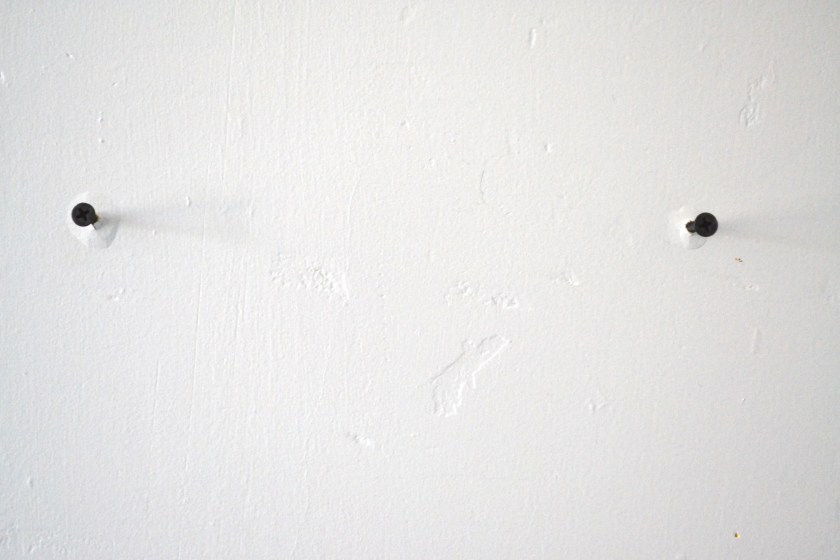
Step 4:
Place the branch on the wall, and add your jewelry! This is the fun part! 🙂 If your stick has little tiny branches sticking out of it, like mine does, you can add rings to it! I also hung some earrings from it, too.

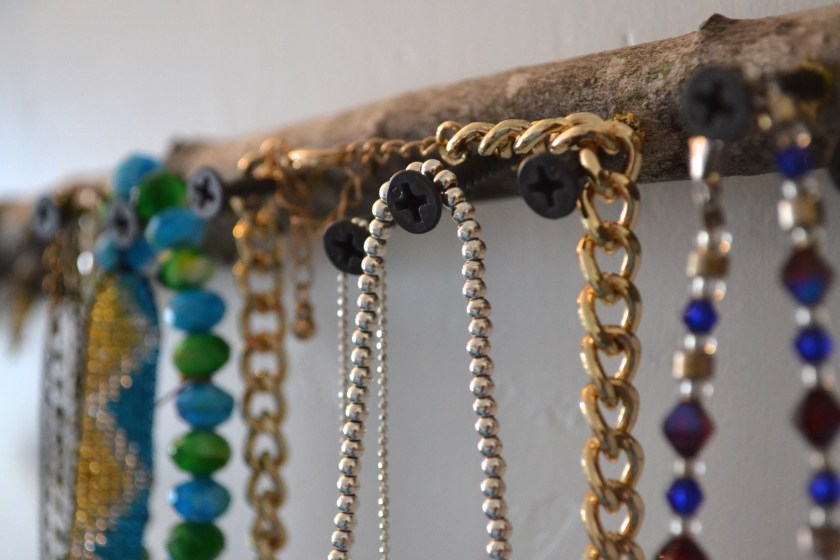
This was a super fun craft, and it looks so good in my room! I think it will inspire me to wear more jewelry! If you try this, be sure to tag me in a photo on Instagram or Twitter!
Hope you enjoyed this #StudioJosieDIY!
Happy Sunday!
March 2016 Playlist!
Happy Wednesday! I think every month I’m going to try to share my playlist from the month. Since tomorrow’s the last day of March, I thought I’d do it now! In case any of you don’t have Spotify, I’ll post all the songs on here. Enjoy and follow me on Spotify to listen to my playlists!
-
Unwritten // Natasha Bedingfield
-
Brighter Than The Sun // Colbie Caillat
-
Love Yourself // Justin Bieber
-
Cake By The Ocean // DNCE
-
My House // Flo Rida
-
I’m Yours // Jason Mraz
-
Tiny Dancer // Elton John
-
Cheap Thrills // Sia
-
Alive // Sia
-
Big Girls Cry // Sia
-
Clarity // Zedd
-
Me, Myself, & I // G-Eazy
-
7 Years // Lukas Graham
-
Let It Go // James Bay
-
Hide Away // Daya
-
NO // Meghan Trainor
