Last night, I was reorganizing my room a bit. I came across a box of jewelry and some necklaces were tangled together, and I decided to organize them. I looked up jewelry holder DIY’s on Pinterest and they were all pretty complicated and/or had materials I don’t have. I have been into doing weaving with sticks lately, and I had some unused ones in my room. (Weird, I know!)
Here are the materials you’ll need:
-Drywall screws (or whatever kind of screws you have, it really doesn’t matter)
-screwdriver
-branch (preferably a sturdy one that will be able to hold your jewelry.)
-jewelry
Here’s how I made it:
Step 1:
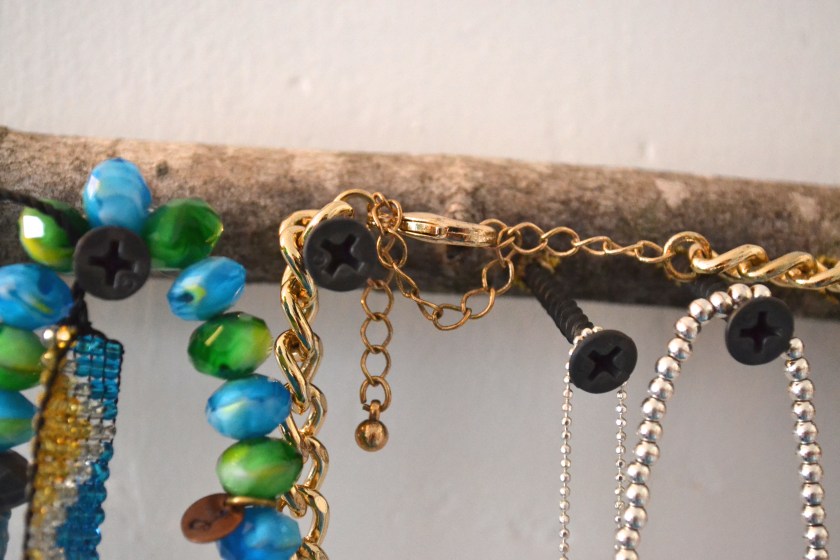
Take the branch and place the screw where you want it.
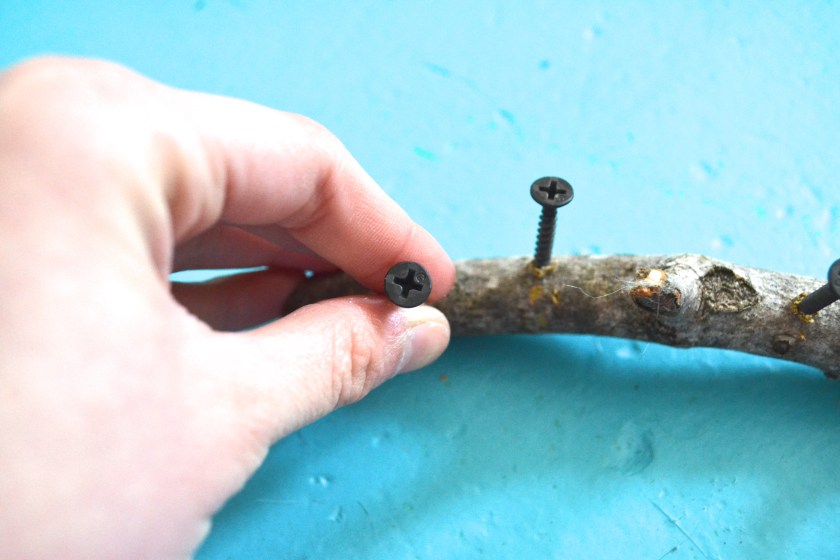
Step 2:
Take the screwdriver and twist the screw into the branch. You will need to push it in with a lot of force. You’ll know when it’s secure. I don’t like mine super close together and perfect. I mean… it IS a stick, after all, and sticks aren’t perfect! 🙂 I placed them all down the branch until it was pretty full, but you can do as many as you want.

Step 3:
Figure out where you want it on your wall. Depending what kind of wall you have, you may have to use a different kind of screw, but since mine are drywall, I used the same kind that I used in the branch. So if your walls aren’t drywall, check before you put in the screws!!
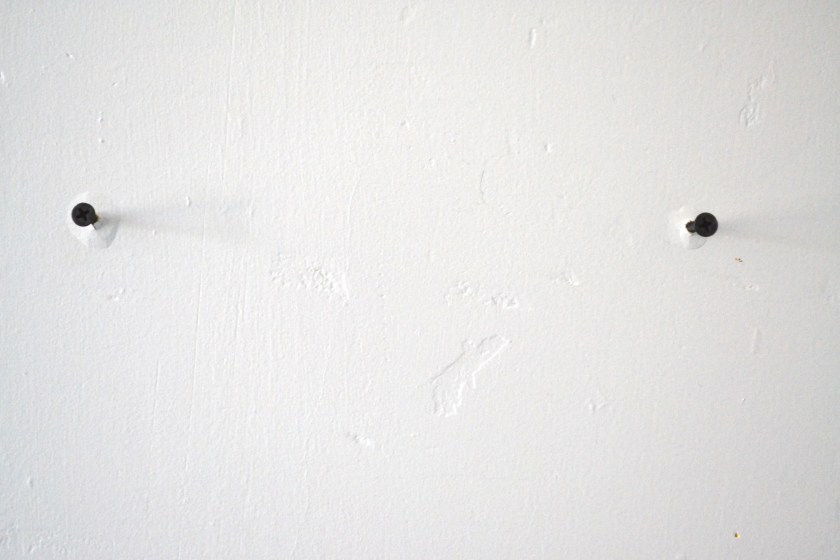
Step 4:
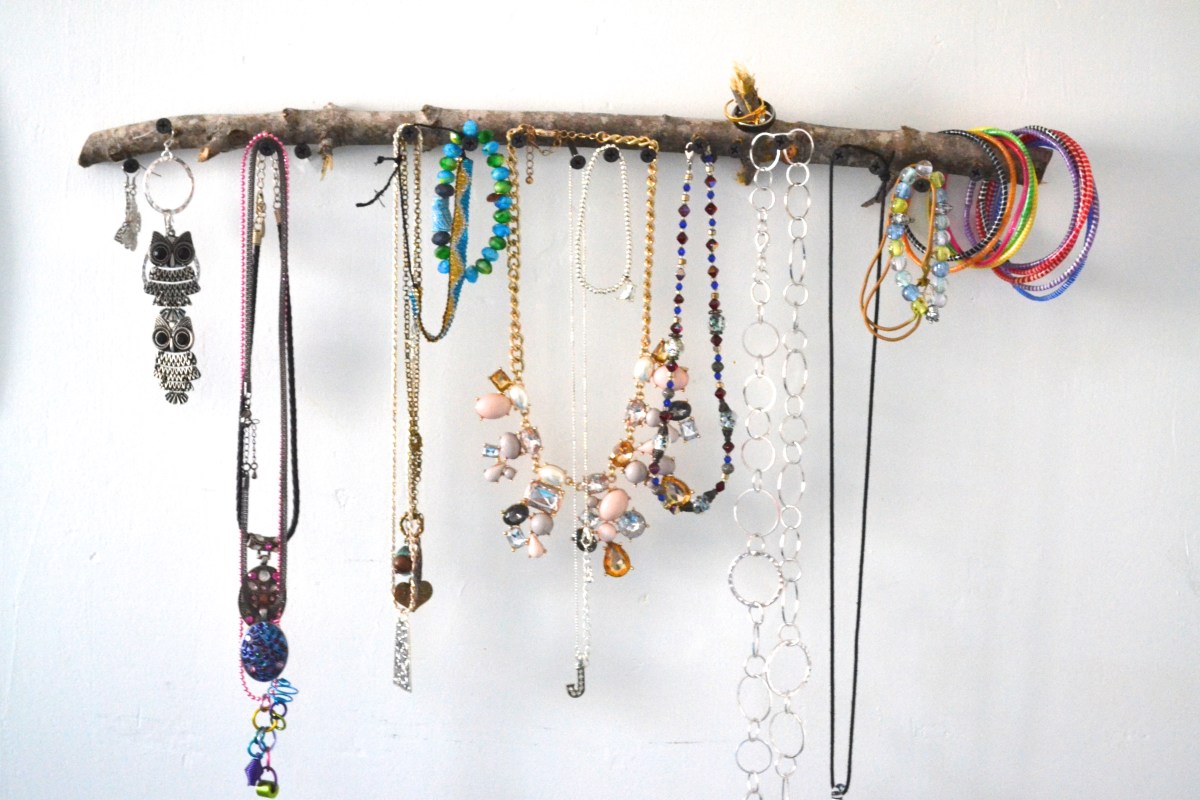
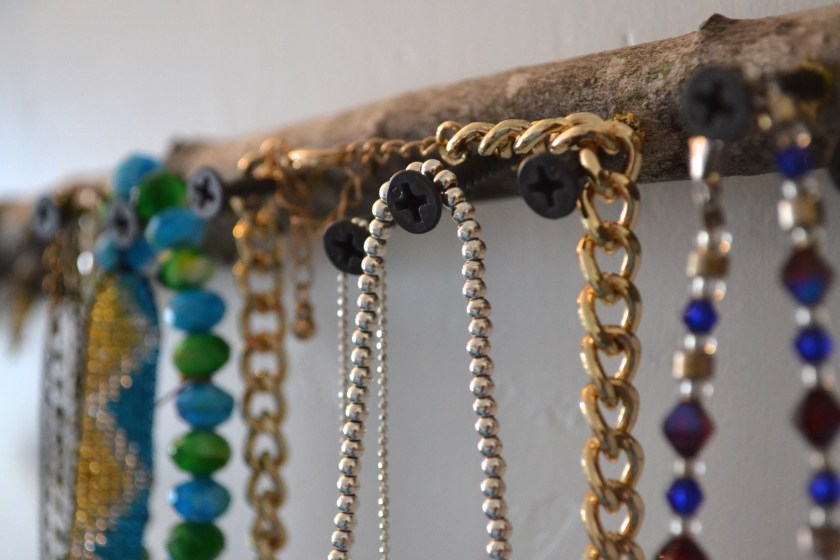
Place the branch on the wall, and add your jewelry! This is the fun part! 🙂 If your stick has little tiny branches sticking out of it, like mine does, you can add rings to it! I also hung some earrings from it, too.

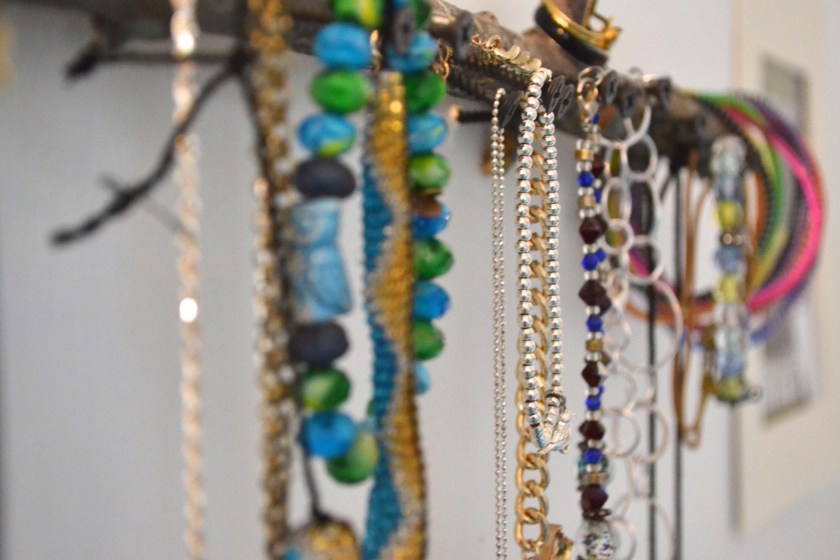
This was a super fun craft, and it looks so good in my room! I think it will inspire me to wear more jewelry! If you try this, be sure to tag me in a photo on Instagram or Twitter!
Hope you enjoyed this #StudioJosieDIY!
Happy Sunday!
